Lupine Publishers| Journal of Dentistry and Oral Health Care
Abstract
Dental implants have become a quite successful method for restoration of fully and partially edentulous patients. Impression procedure becomes exacting in implantology as compared to fixed partial denture because of lack of periodontal ligament fibers in implants. Traditionally, there are two different implant impression techniques for transferring the impression copings from the implant to the impression. The transfer technique uses tapered copings and a closed tray to make an impression. Conversely, the pick-up impression uses square copings and an open tray (a tray with an opening), allowing the coronal ends of the impression coping screw to be exposed. This article describes the Pick-up implant impression procedure that is inexpensive, clean, and easy to perform with materials commonly found in a restorative dental practice and deals with its advantages and limitations.
Keywords: Implant Impression; Implant Direct Impression; Open Tray - Pick Up Impression Coping
Introduction
The success of implant-supported restorations relies on how well the hard and soft tissue information is transferred to the laboratory [1,2]. The critical aspect is to record the threedimensional orientation of the implant as it is present intraorally, other than reproducing fine surface detail for successful implant prosthodontic treatment [3-5]. The development of impression techniques to accurately record implant position has become more complicated and challenging. Several impression techniques have been suggested to obtain a master cast that will ensure the passive fit of prosthesis on implants [6]. In implant dentistry, the two traditional ways of making an impression are the closed tray and the open tray technique. Both impression techniques have their advantages and disadvantages [7]. A recent systematic review revealed that the open tray impression technique is more accurate than the closed tray impression technique [8,9]. It has been shown that the pickup type impression coping is the more accurate type of impression as errors occur on removal and replacement of the transfer type impression copings, especially in the occlusion-gingival direction [10,11]. Characteristics of the Pickup type impression coping are that they are removed from the mouth together with the set impression. They require access to the retaining screw to allow release of the screw prior to removal of the impression coping-impression assembly, the analogues are attached to the impression copings while they are embedded in the impression tray. A custom tray with access to the impression coping screws is required [12].
Clinical Case
Open Tray Impression Procedure
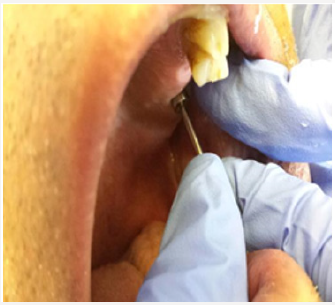
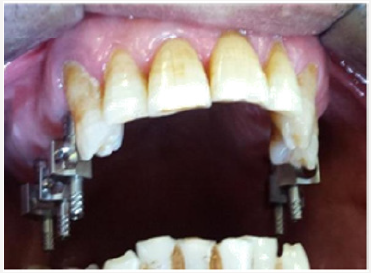
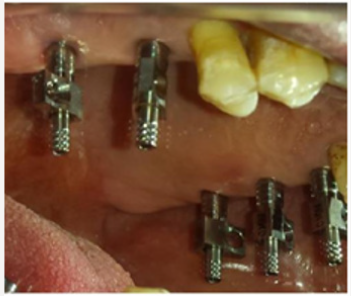
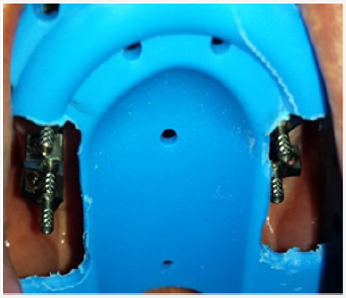
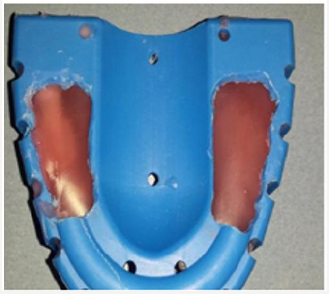
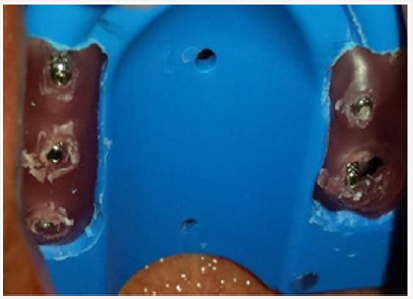
A patient consulted the Department of Fixed Prosthodontics at the Dental Clinic of Monastir to replace his bilateral terminal maxillary edentulism by implant-supported fixed prostheses . The patient had a sufficient and rectilinear mouth opening. We decided to make him five maxillary implants. To record the spatial position of the implants, we have chosen “Open tray Impression technique “using the direct pick-up copings . In the first time, the healing screws were removed (Figure 1). Then, the square impression copings were placed into the implants (Figures 2 & 3). The guide screws were tightened using the screwdriver. Retroalveolar X-rays were taken along the long axis of the implant to ensure that the impression copings were seated completely into the hex of the implants (Figure 1). The tray was perforated in the regions where implants were placed to provide access for the pick-up copings (Figure 4). The impression tray was coated with manufacturer recommended impression adhesive 5 minutes before each impression was made. Tray adhesive was applied thinly and evenly over the inner surface of each tray and extended approximately 3mm onto the outer surface of the tray along periphery. The adhesive was allowed to dry for 15 minutes before impression (Figure 4). The tray was removed from the mouth and two sections of boxing wax (Dentsply Intl) were adapted over the open-ings in the tray and sealed to the tray using a hot instrument (Figures 5 & 6).
Other open-tray impression protocols recommend wiping off the excess impression material that extrudes through the hole in the tray with a gloved finger or injecting impression plaster through the hole(s) in the tray to fill the remaining void. This may be messy to accomplish. Additionally, the powder on some gloves may inhibit the polymerization of vinyl polysiloxane (VPS) impression materials Wax placed over the hole in the tray prevents contact of the impression material with the gloves [13]. The heavy consistency polyvinylsiloxane impression material was loaded inside the impression tray and light consistency polyvinylsiloxane impression material was meticulously syringed around the impression copings to ensure complete coverage of the copings (Figure 7).
Read More About Lupine Publishers Journal of Dentistry and Oral Health Care Please Click on Below Link: https://lupine-dentistry-oral-health-care.blogspot.com/

No comments:
Post a Comment
Note: only a member of this blog may post a comment.